2.4 Hot bed components
2.4 Hot bed components
2.4.1 Bottom acrylic plate installation
- Material preparation
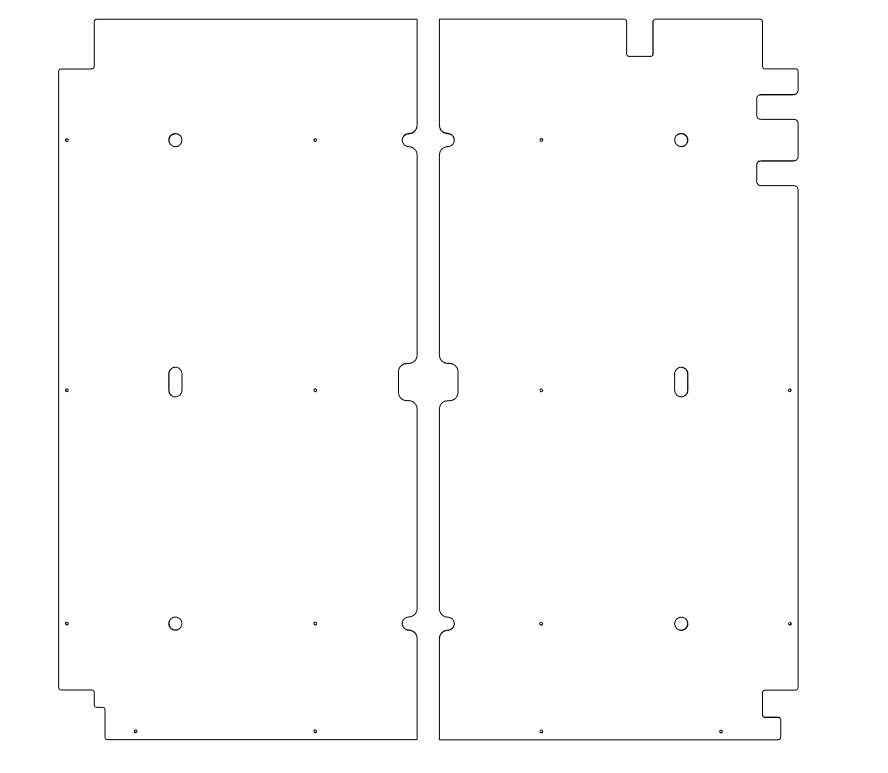
- Place the acrylic sheet on the frame base;Use M3x6 BHCS to fix the acrylic sheet to the profile frame;
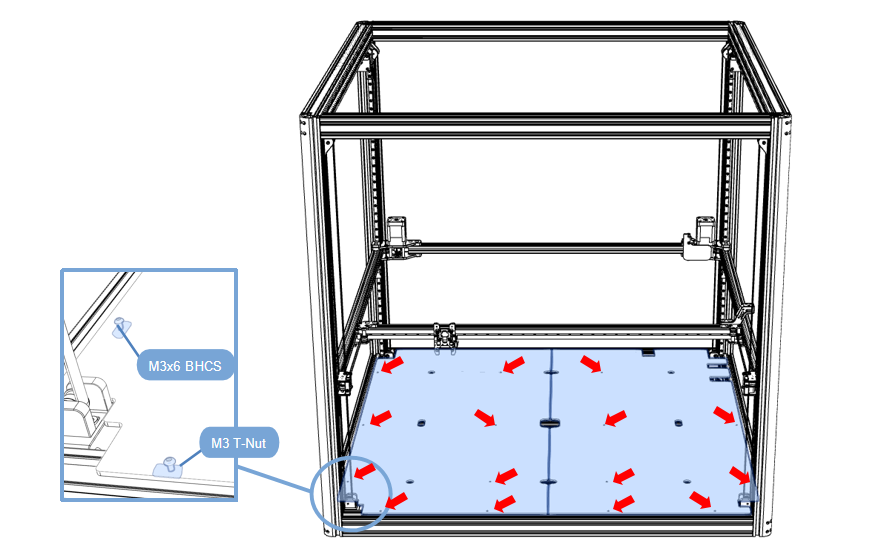
2.4.2 Hot bed assembly installation
- Material preparation:Aluminum plate, silicone heating pad, Insulation cotton, magnetic stickers, Thermal fuse
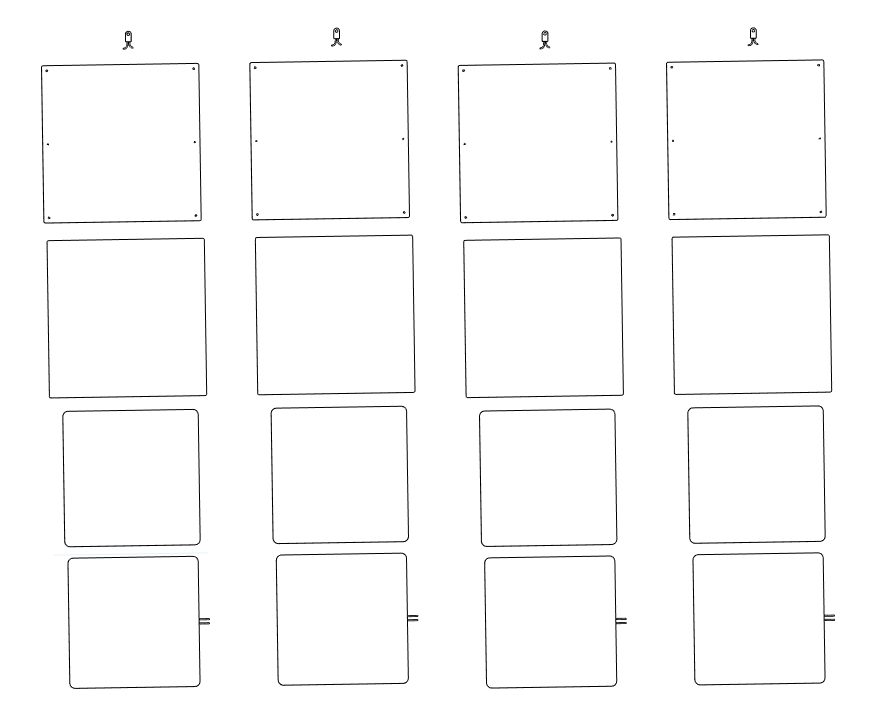
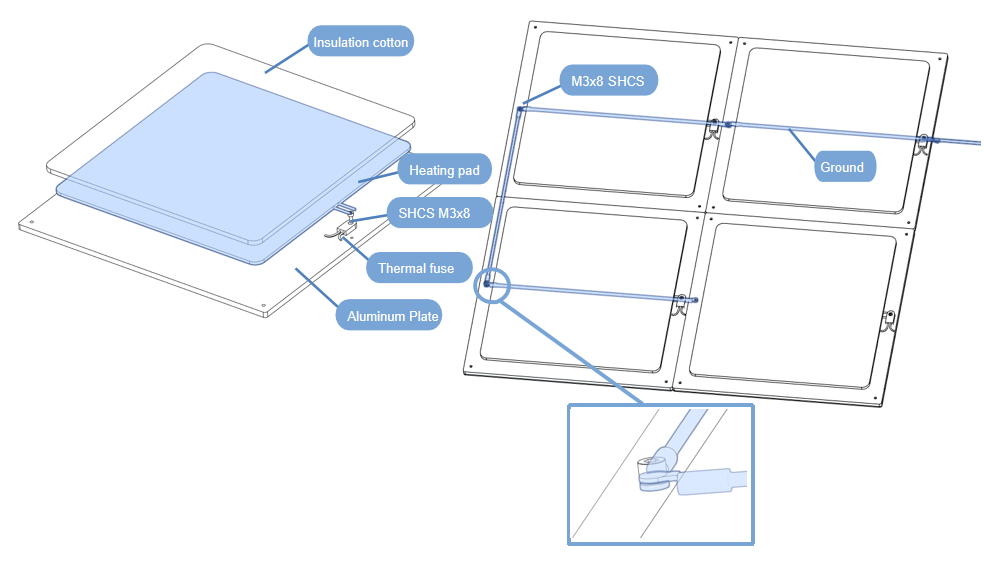
Hot bed assembly、Thermal Fuse Installation、Ground wire installation
- Glue the silicone heating pad to the back of the hot bed in the center;
- Glue the insulation cotton to the silicone heating pad;
- Use SHCS M3x8 to fix the thermal fuse to the heat bed;
- Use SHCS M3x8 on the other side to fix the ground wire;
2.4.3 Hot bed assembly fixing
Hot bed isolation column
- Place an M3 ball nut in the profile groove;
- Put the spring through the black nylon isolation column and place it in the acrylic plate groove;
- The hole of the ball nut should be consistent with the hole of the profile;
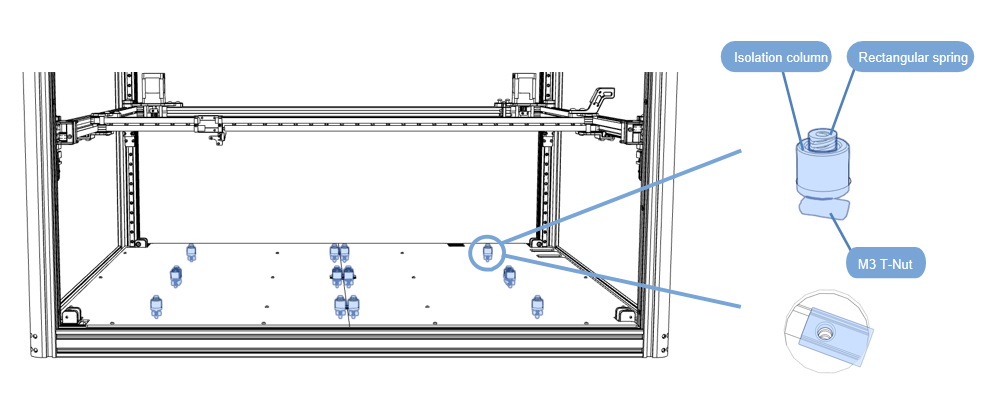
Hot bed fixed
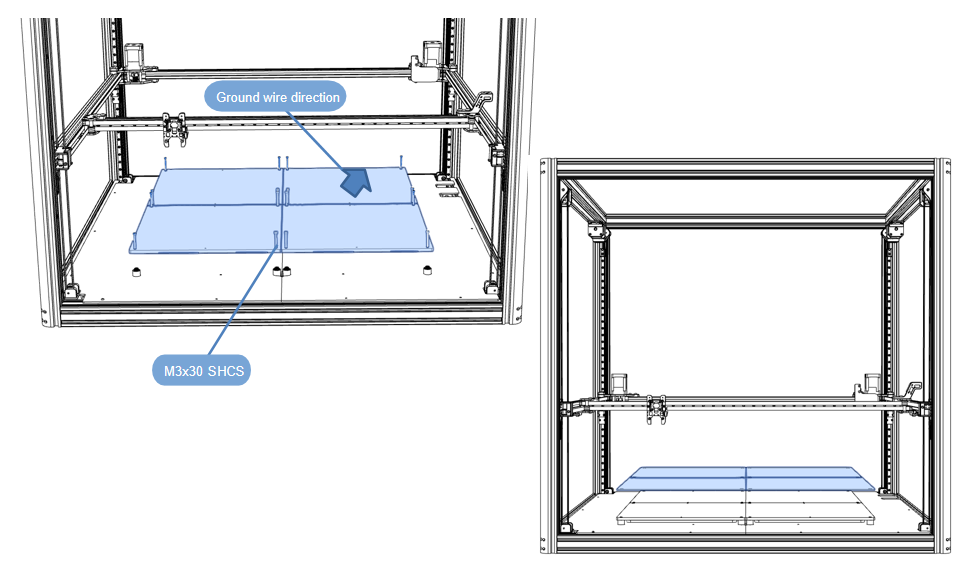
- Place the 4 hotbeds on the springs;
- Use the M3x30 SHCS screws to tighten, and screw them to the bottom;
- Stick the 4 magnetic tiles of the hotbed to the aluminum plate and scrape them flat without bubbles;
- Pass all the wires of the hot bed through this hole;
- And mark the power cord and thermistor wire of the hot bed with sticky notes according to the diagram for later wiring;
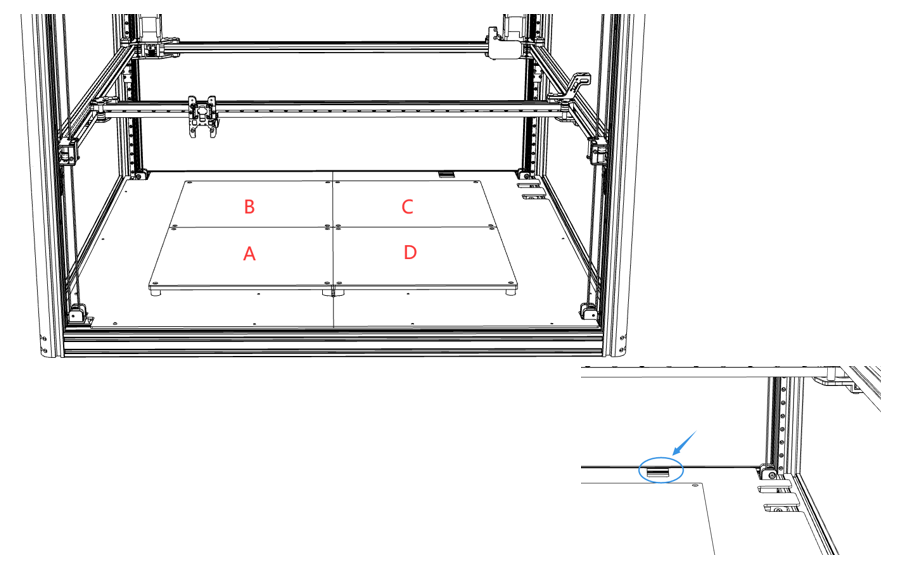
This chapter is assembled
Updated on: 01/07/2026
Thank you!