TMC2100
Product Introduction
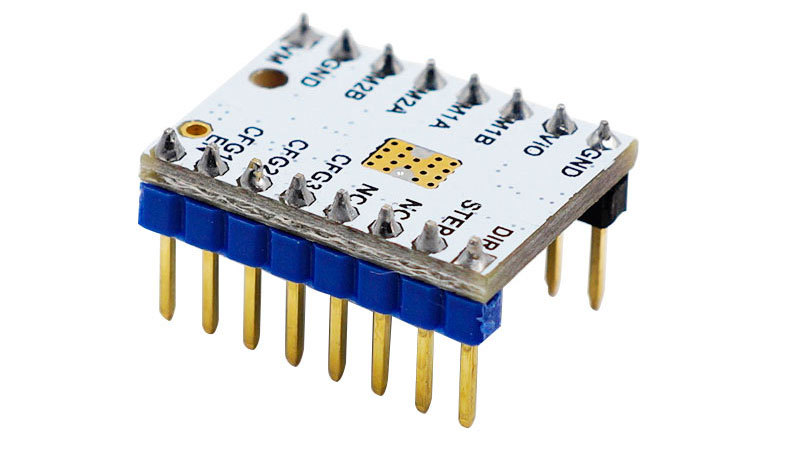
The TMC2100 provides an integrated motor driver solution for 3D-Printing, Cameras, Scanners and other automated equipment applications. The device has an integrated microstepping indexer, the completely noiseless current control mode StealthChop™ and is intended to drive a bipolar stepper motor. The output driver block consists of low RDSon N-Channel power MOSFETs configured as full H-bridges to drive the motor windings. The TMC2100 is capable of driving up to 2.5A of current from each output (with proper heatsinking). TMC2100 is designed for a supply voltage of 5~46V. The device has a step and direction interface and can be configured with digital pins.
Features
- Hardware compatible with StepStick and Pololu A4988 Stepper Driver
- Components on bottom PCB side for better heat emission
- Automatic standby current reduction
- stealthChop - for quiet operation and smooth motion
- spreadCycle - highly dynamic motor control chopper
- Drive capability up to 1.2A (RMS) continuous coil current
- Step/Dir interface with microstep interpolation (up to 256 microsteps)
- Configuration via CFG pins
Specifications
Model | TMC2100 |
|---|---|
Interface | Step/Dir |
Configuration | CFG Pins |
Native Microsteps | up to 1 ⁄ 16 |
microPlyer Microsteps | 1 ⁄ 256 |
Logic Supply Voltage (VIO) | 3 - 5V |
Motor Supply Voltage (VM) | 5.5 - 46V |
Motor Phase Current max | 1.2A RMS, 2.5A Peak |
Internal V- Regulator | enabled |
RDSon | >=0.5 Ohm |
stealthChop (quiet) | yes |
spreadCycle | yes |
coolStep | no |
stallGuard | no |
dcStep | no |
Pin Functions
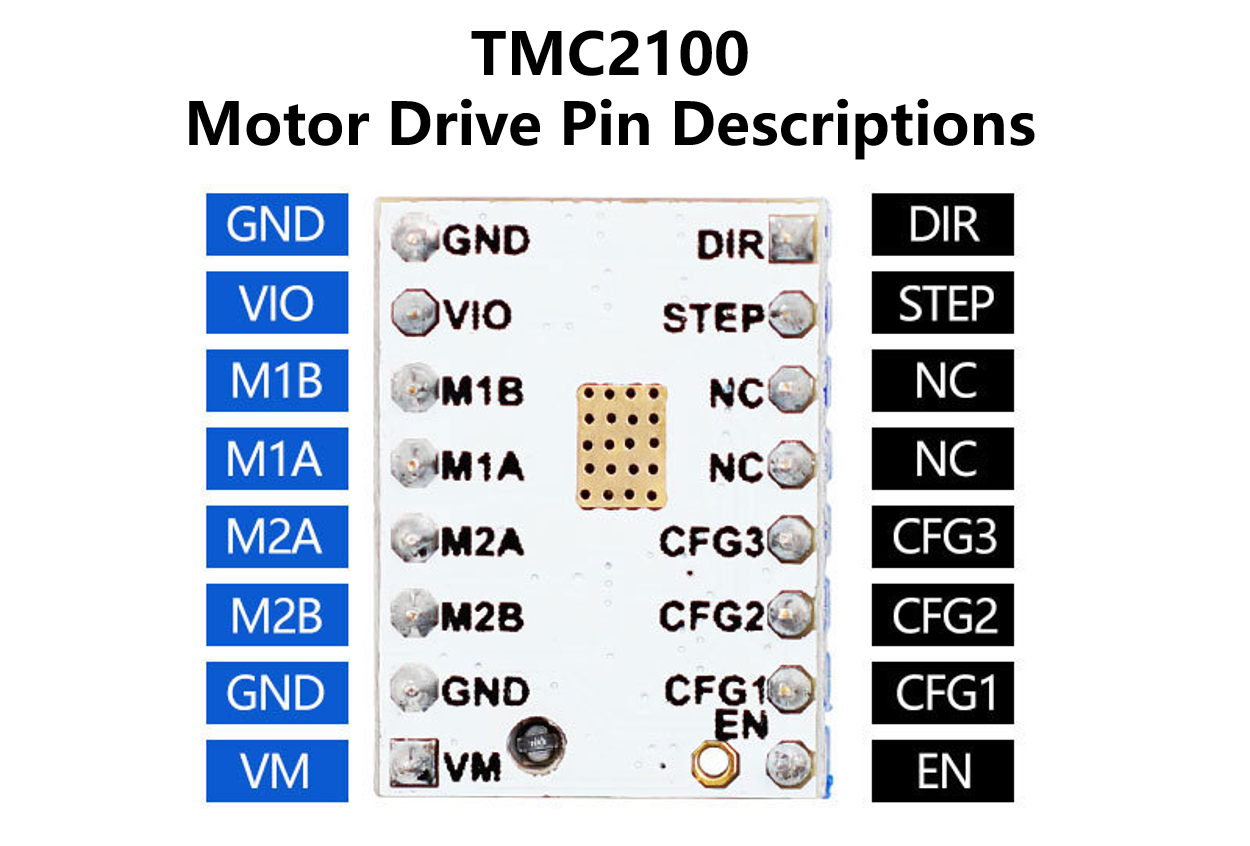
Pin | Function |
|---|---|
Power Supply | |
GND | Ground |
VM | Motor Supply Voltage |
VIO | Logic Supply Voltage |
Motor Outputs | |
M1A | Motor Coil 1 |
M1B | Motor Coil 1 |
M2A | Motor Coil 2 |
M2B | Motor Coil 2 |
Control Inputs | |
STEP | Step-Signal Input |
DIR | Direction-Signal Input |
TMC2100 | |
EN | Enable Motor Outputs: GND=on, VIO=off, OPEN=Auto-Power-Down |
CFG0 | Chopper Off Time TOFF: GND=140tclk, VIO=236tclk, OPEN=332tclk |
CFG1 | Step-Configuration |
CFG2 | Step-Configuration |
CFG3 | Current Setting: GND=int, VIO=int, OPEN=ext |
CFG4 | Chopper Hysteresis HEND: GND=5, VIO=9, OPEN=13 |
CFG5 | Chopper Blank Time TBL: GND=16, VIO=24, OPEN=36 |
DIAG0 | Diagnostics Output 0 |
DIAG1 | Diagnostics Output 1 |
VREF | Analog Reference Voltage |
Interface Resources
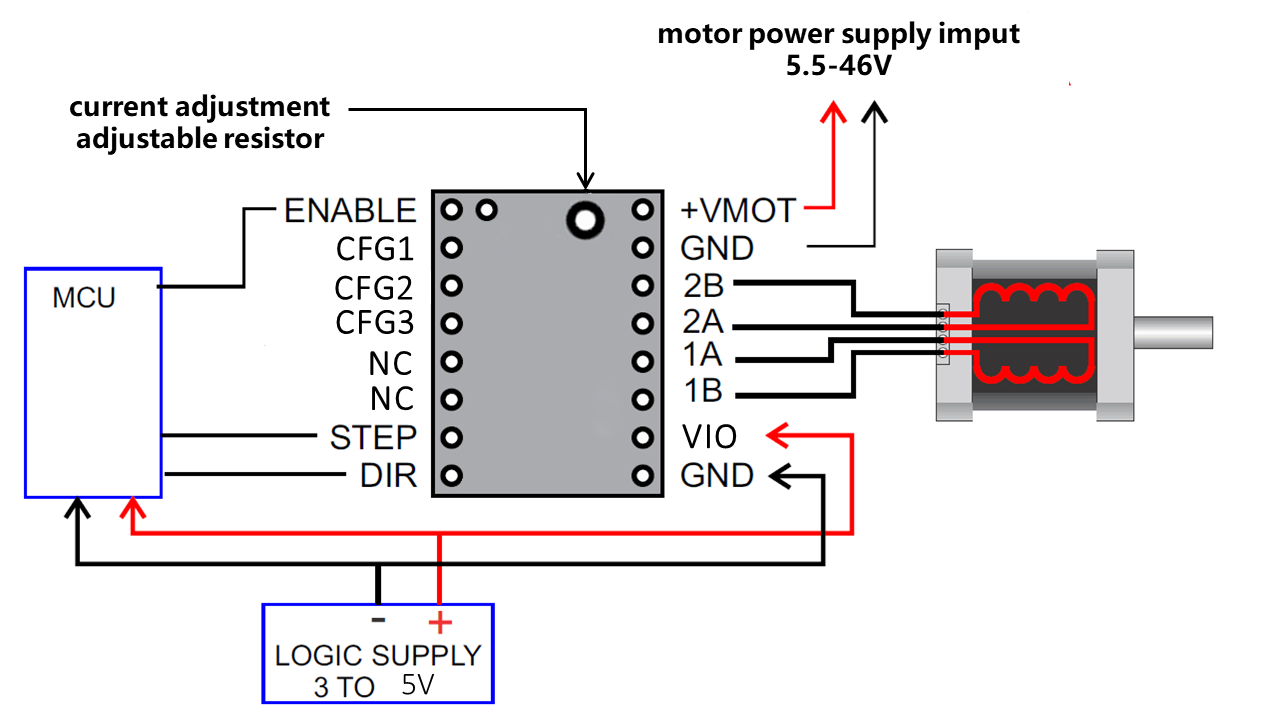
Wiring Diagram
Motor Current Setting
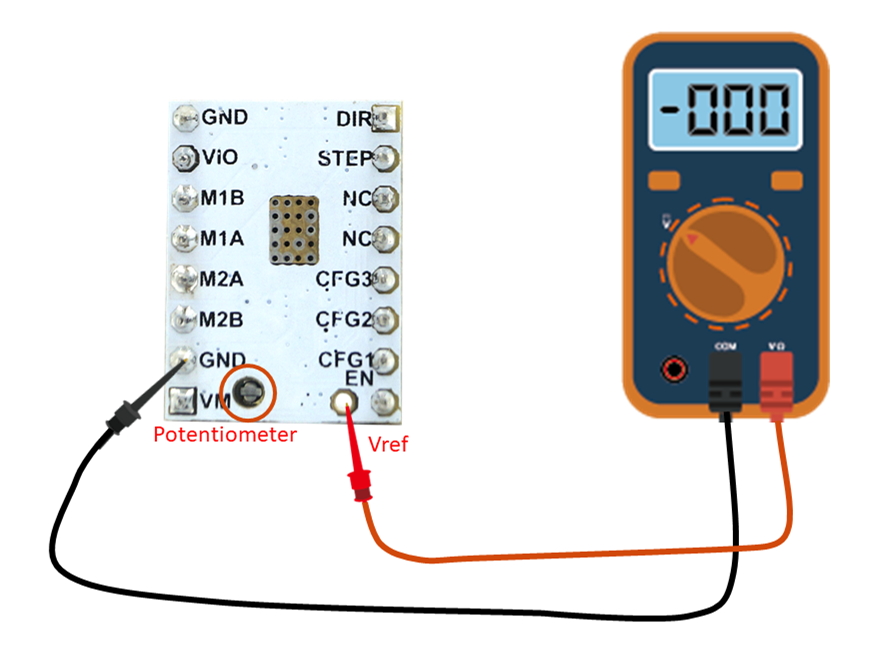
The best way to set the motor current is by measuring the voltage on the Vref pin (0…2.5V) and adjusting the voltage with the potentiometer. The maximum settable motor current is 1.77A RMS (0.11Ohm sense resistors), but the SilentStepSticks can only be used up to 1.2A RMS.
Irms = (Vref _ 1.77A) / 2.5V = Vref _ 0.71
Vref = (Irms _ 2.5V) / 1.77A = Irms _ 1.41 = Imax
Vref -> Voltage on Vref pin
Irms -> RMS (Root Mean Square) current per phase (Irms = Imax / 1.41)
Imax -> Maximum current per phase (Imax = Irms * 1.41)
1.Vref measures Gnd and the voltage at the middle of the potentiometer.2.Do not connect the motor when measuring the voltage, otherwise it is easy to burn the driver.3.Power should be connected when measuring voltage, do not just connect USB power supply.Micro-stepping
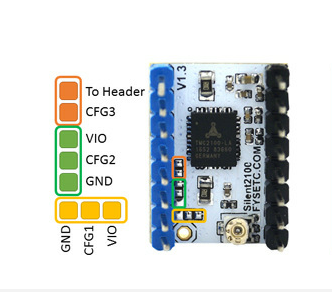
CFG2 | CFG1 | Steps | Interpolation | Mode |
|---|---|---|---|---|
GND | GND | 1 | spreadCycle | |
GND | VIO | 1⁄2 | spreadCycle | |
GND | OPEN | 1⁄2 | 1⁄256 | spreadCycle |
VIO | GND | 1⁄4 | spreadCycle | |
VIO | VIO | 1⁄16 | spreadCycle | |
VIO | OPEN | 1⁄4 | 1⁄256 | spreadCycle |
OPEN | GND | 1⁄16 | 1⁄256 | spreadCycle |
OPEN | VIO | 1⁄4 | 1⁄256 | stealthChop |
OPEN | OPEN | 1⁄16 | 1⁄256 | stealthChop |
Instructions for Use
- When using on Ramps1.4 or MKS Gen, please remove the three jumper caps under the socket.
- Pay attention to the direction.
- The heat sink is directly attached to the PCB.
- The motor direction is the opposite of 4988 and 8825. If you want to replace the 4988 directly, please adjust the firmware or adjust the motor connection.
Shop
Tech Support
Please submit any technical issue into our forum
Updated on: 03/08/2026
Thank you!